本文最后更新于:2022年3月13日 凌晨
Hadoop伪分布式部署
Hadoop单台机安装
## ❇️技术参考:
Hadoop伪分布式部署.pdf
一、环境准备
服务器系统:CentOS 7.6也就是CentOS 1810
单服务器版本安装:IP:10.129.1.110
在更改本地源以前安装vim(个人使用习惯)
二、搭建环境初始化
1、关闭防火墙
1
2
| systemctl stop firewalld
systemctl disable firewalld
|

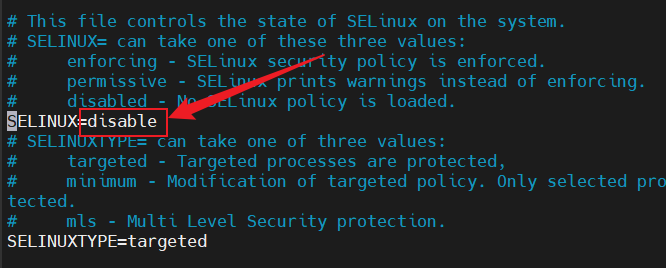
2、关闭Selinux
1
2
| setenforce 0
vim /etc/selinux/config
|
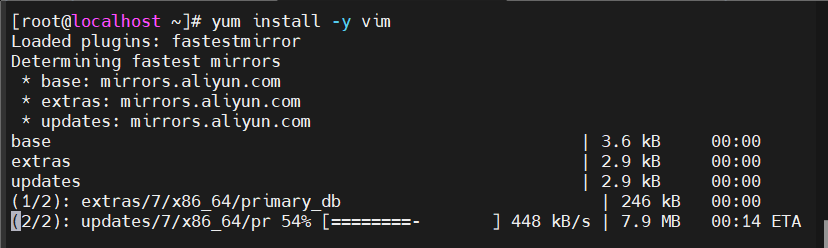
3、更换本地源
1
2
3
| mkdir /opt/centos /opt/yum
mv /etc/yum.repos.d/* /opt/yum/
vim /etc/yum.repos.d/local.repo
|
1
2
3
4
5
| [centos]
name=centos
baseurl=file:///opt/centos
gpgcheck=0
enabled=1
|
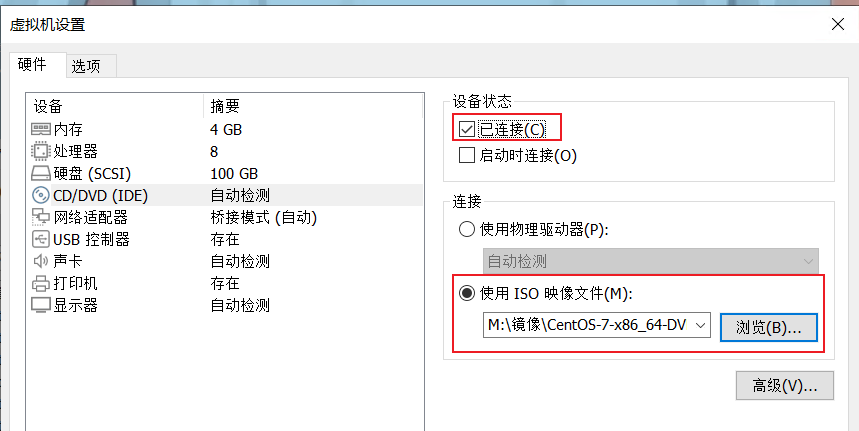
挂载上安装系统的镜像
1
2
3
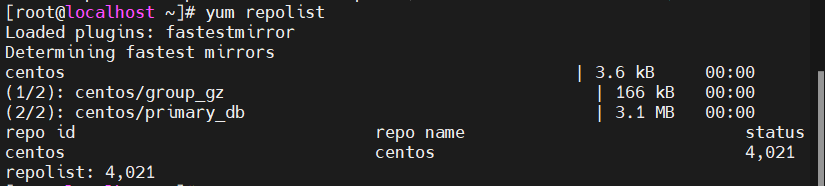
| mount /dev/sr0 /opt/centos/
yum clean all
yum repolist
|
4、更改主机名
1
| hostnamectl set-hostname wss34
|

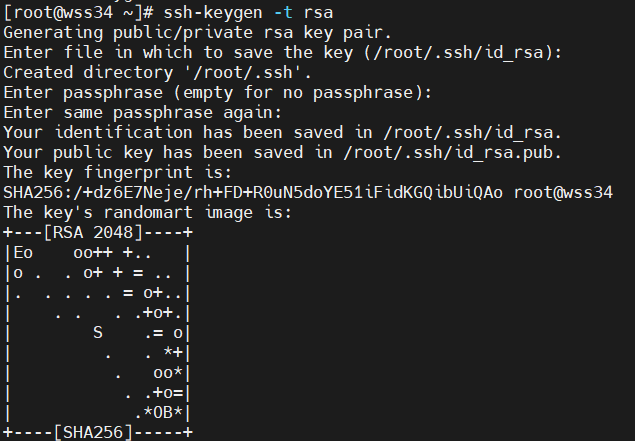
5、设置免密登录
1
| ssh-keygen -t rsa # 一路回车下去就行
|
1
| cat /root/.ssh/id_rsa.pub >> /root/.ssh/authorized_keys
|
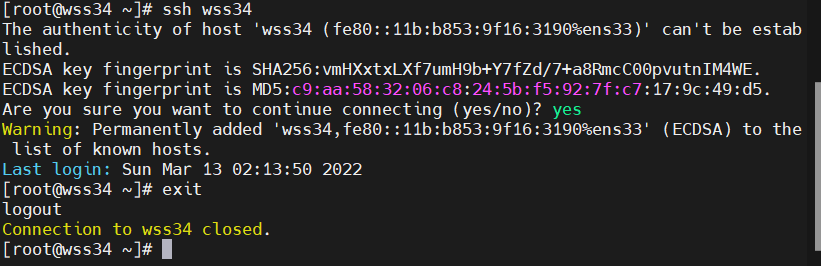
6、测试免密登录
7、上传安装文件到家目录

三、搭建Hadoop
1
2
| tar -xf jdk-8u162-linux-x64.tar.gz -C /usr/lib/jvm/
vim /etc/profile
|
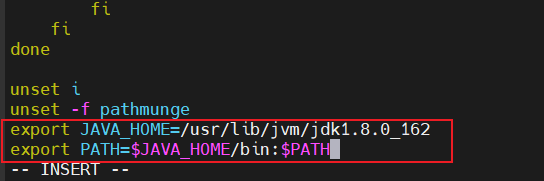
在文件末尾添加
1
2
| export JAVA_HOME=/usr/lib/jvm/jdk1.8.0_162
export PATH=$JAVA_HOME/bin:$PATH
|
刷新环境变量配置

1
2
3
| tar -xf hadoop-3.1.3.tar.gz -C /usr/local/
mv /usr/local/hadoop-3.1.3/ /usr/local/hadoop
vim /etc/profile
|
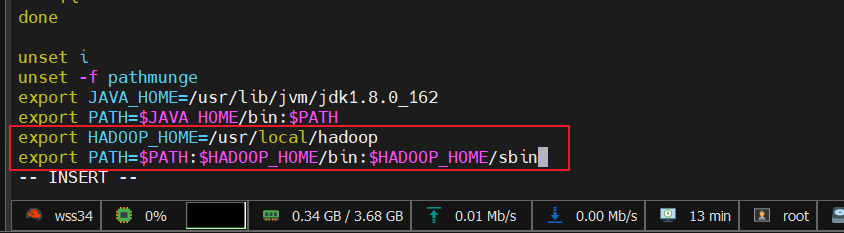
在文件末尾添加
1
2
| export HADOOP_HOME=/usr/local/hadoop
export PATH=$PATH:$HADOOP_HOME/bin:$HADOOP_HOME/sbin
|
刷新环境变量配置

1
2
| hdfs namenode -format
vim /etc/profile
|
 在文件末尾添加
1
2
3
4
5
| export HDFS_NAMENODE_USER=root
export HDFS_DATANODE_USER=root
export HDFS_SECONDARYNAMENODE_USER=root
export YARN_RESOURCEMANAGER_USER=root
export YARN_NODEMANAGER_USER=root
|
刷新环境变量配置
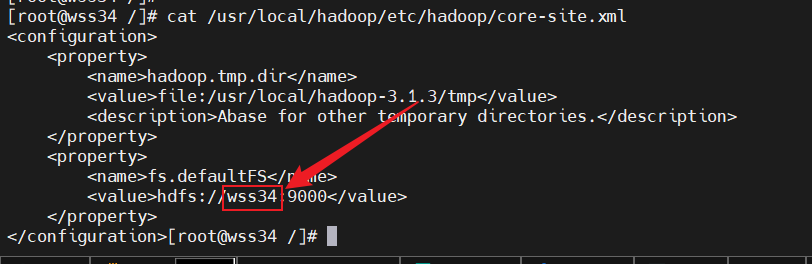
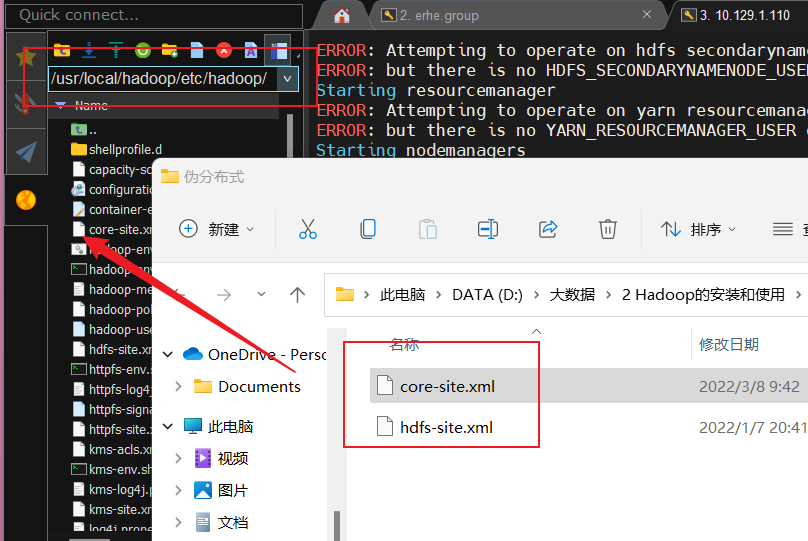
上传Hadoop两个配置文件到/usr/local/hadoop/etc/hadoop/目录下
core-site.xml
hdfs-site.xml
PS:记得把core-site.xml这个配置文件里面的localhost改成刚刚自己设置的计算机名
1
| vim /usr/local/hadoop/etc/hadoop/hadoop-env.sh
|
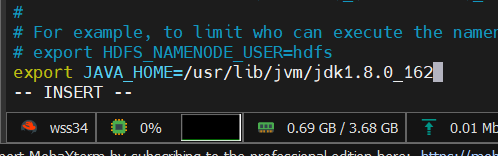
在文件末尾添加
1
| export JAVA_HOME=/usr/lib/jvm/jdk1.8.0_162
|
启动脚本
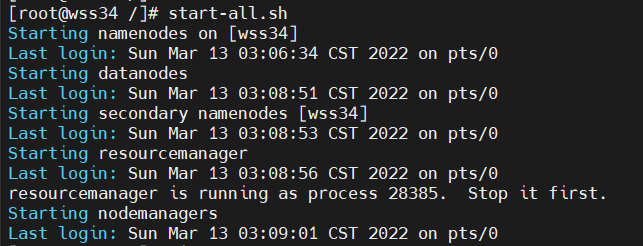
这里就没有报错了
1
2
| mr-jobhistory-daemon.sh start historyserver
jps
|

PS:如果检查自己的不是7个的话,保证自己的环境变量以及配置文件没有错误就重启系统,然后再次运行这两个命令解决。
1
2
3
| start-all.sh
mr-jobhistory-daemon.sh start historyserver
jps
|
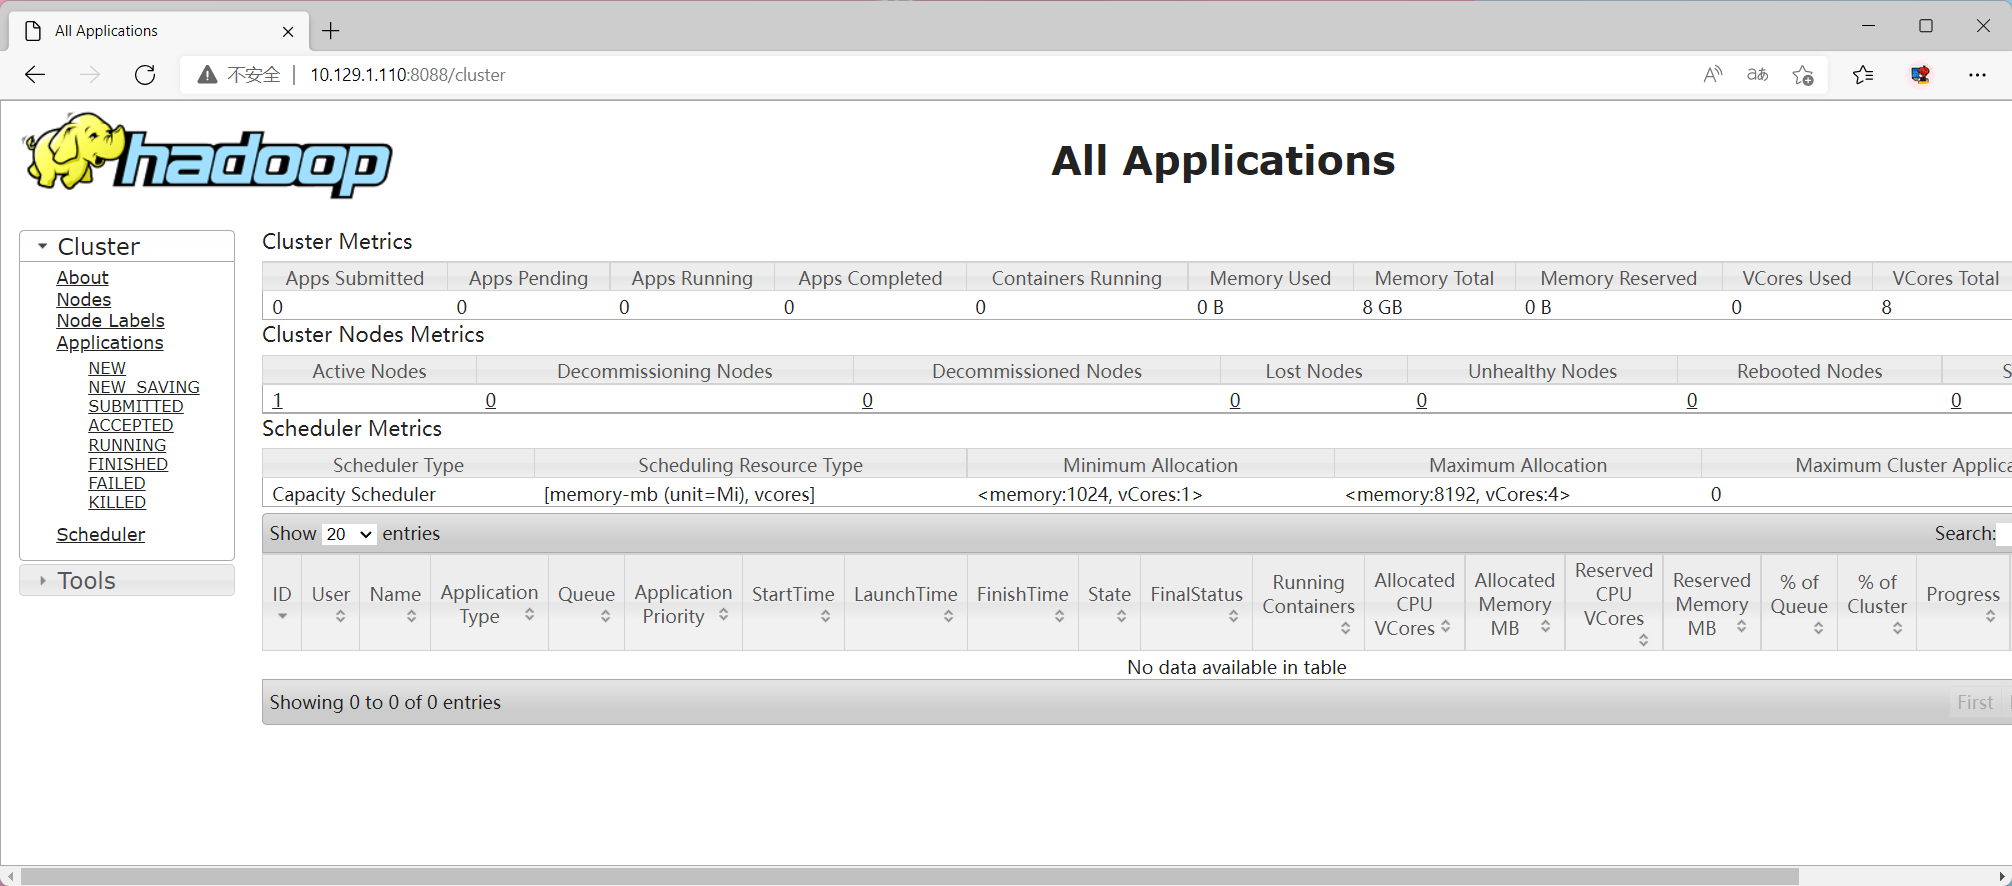
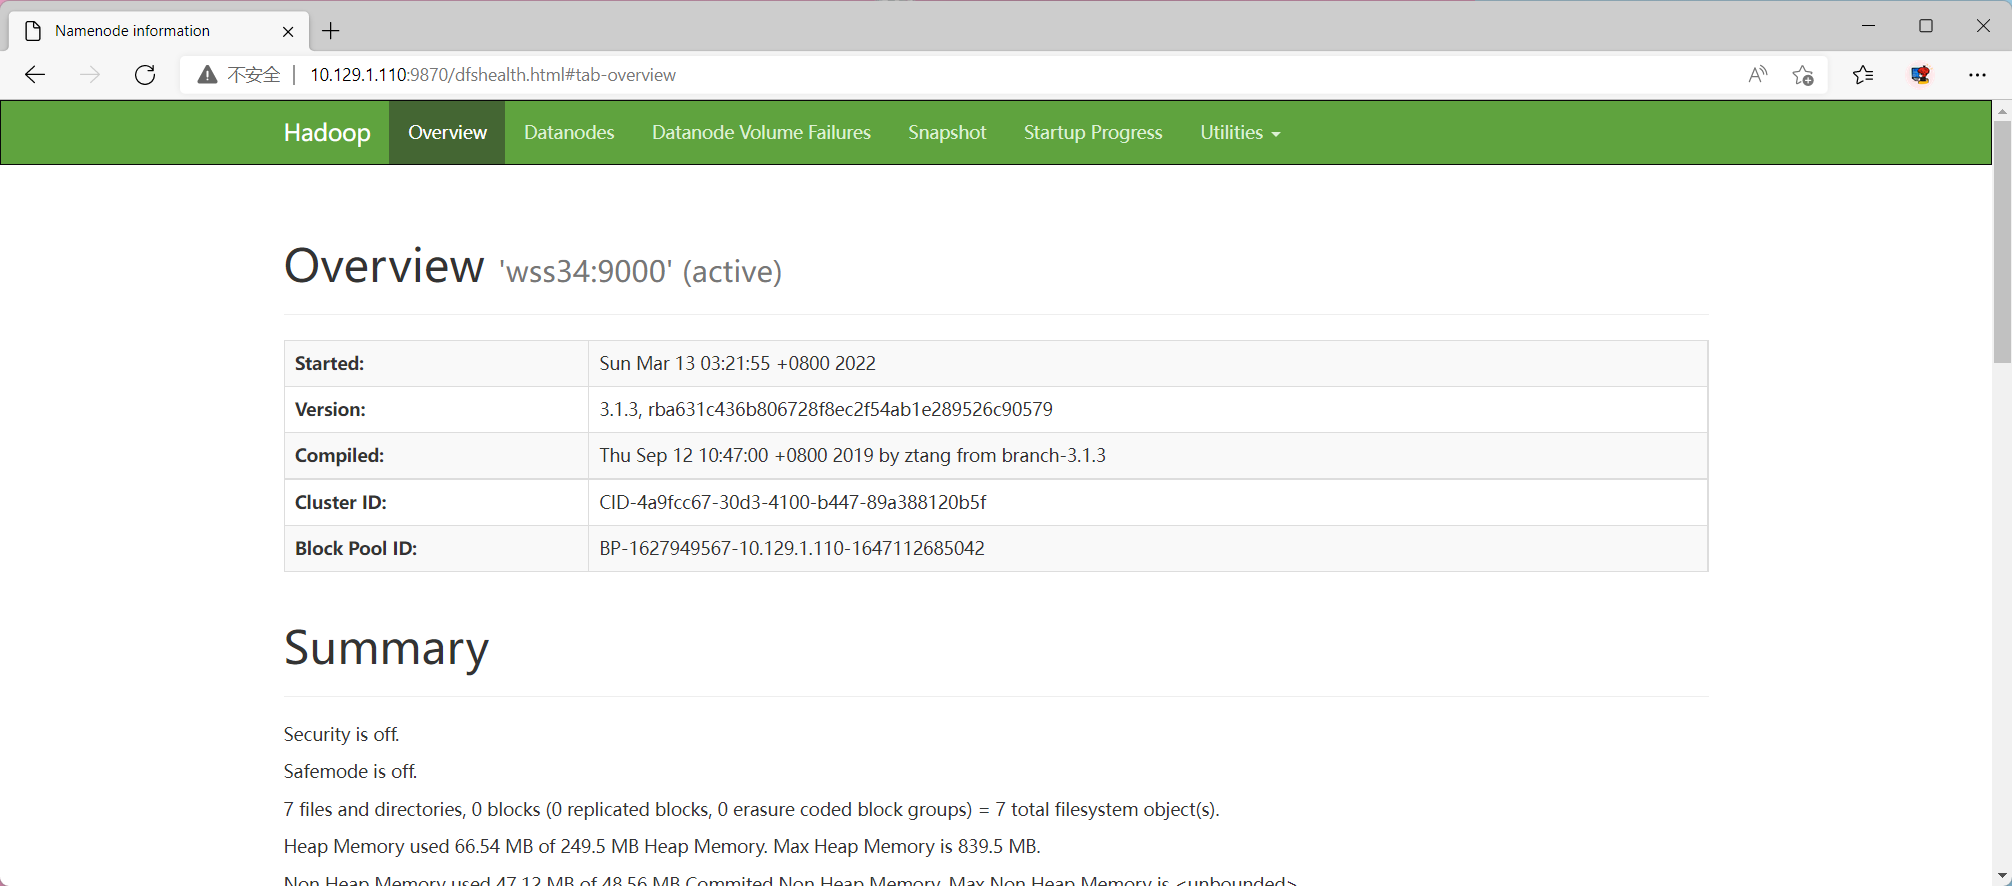
四、验证
📣特别声明
此文章全部都是依靠自己的学习理解来写的原创文章,难免可能会出现有错误的地方,
如果大家以后阅读的时候发现有问题,那就麻烦到下方评论区来进行错误指出,使错误尽快做出改正,
在此,感谢大家的阅读与支持!🤝💦🎉
🍻支持一下
觉得我写的好的话可以支持一下我哦~持续关注我,会更新其他好玩且实用的项目。
👋如果我能帮助到你,那就请我喝杯🧋呗~👇👇👇


